Smart Fan
Use basic components found in most Arduino kits to develop a smart fan which turns on and off based on the temperature and current lighting.
Required Components
- Photo Resistor
- 10k ohm resistor
- Temperature Sensor
- Transistor (P2N2222AG)
- Diode (1N4148)
- DC Motor
- 330 ohm resistor
- Wire
- Breadboard
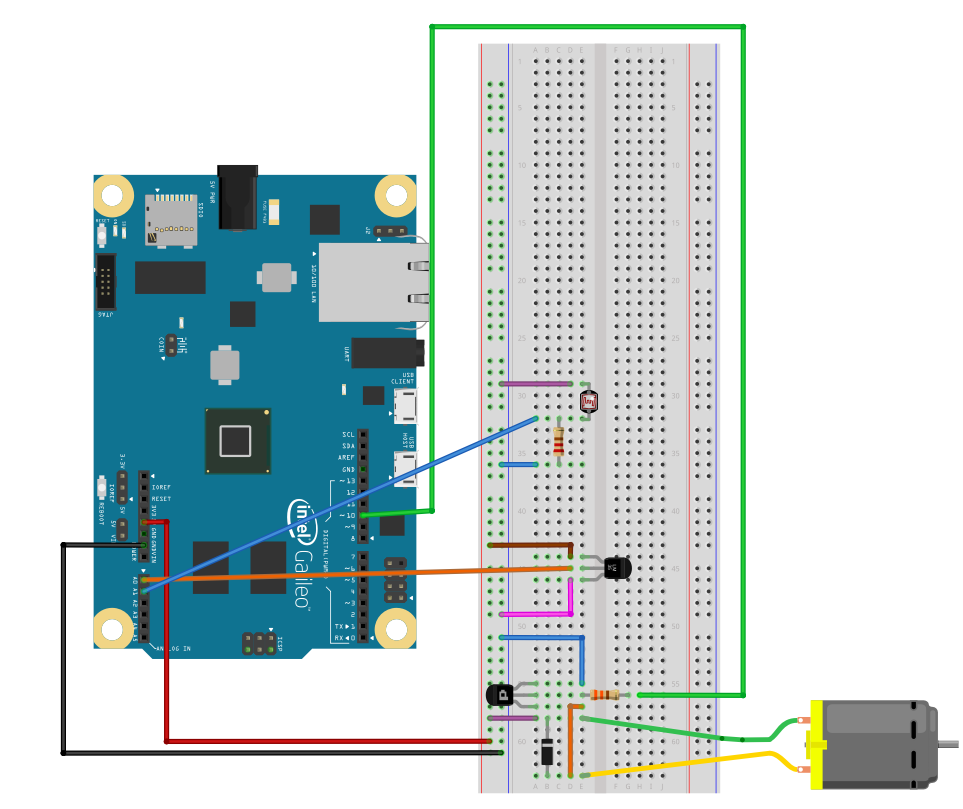
Hooking up Components
Please be sure to use the diode to keep the motor from burning out, and the correct resistors for the Photo Resistor and Temperature Sensor. Please do not mix up the temperature sensor with the Transistor, as it can cause the transistor to overheat.
Create a new project
Open Visual Studio. Select File -> New Project and Select Templates -> Visual C++ -> Windows for IoT -> Galileo Wiring app
Code
Main.cpp
#include "stdafx.h"
#include "arduino.h"

const int MOTOR_PIN    = 10;
const int LIGHT_PIN    = 1;
const int TEMP_PIN     = 0;

// In celcius
const double FAN_ON_TEMP = 20.0;

int _tmain(int argc, _TCHAR* argv[])
{
    return RunArduinoSketch();
}

void init_motor() {
    pinMode(MOTOR_PIN, OUTPUT);
    analogWrite(MOTOR_PIN, 0);
}

void toggle_motor(bool motor_is_on) {
    if (motor_is_on) {
        // Turn off motor
        motor_is_on = false;
        analogWrite(MOTOR_PIN, 0);
	} else {
        // Turn on motor
        motor_is_on = true;
        analogWrite(MOTOR_PIN, 150);
        delay(1);
        analogWrite(MOTOR_PIN, 50);
    }
}

void setup() {
    init_motor();
}

// Analog read returns between 0 - 4095
// Reading between 0 - 5 V Therefore 5 volts / 1024 units
double raw_to_voltage(int reading) {
    return reading * (5.0 / 4096.0);
}

// Convert the voltage
double voltage_to_celcius(double voltage) {
    return 100 * voltage - 50;
}

bool auto_tune_light(int light_sensor_reading) {
    static int min_reading = 4096;
    static int max_reading = 0;
    min_reading = min(min_reading, light_sensor_reading);
    max_reading = max(max_reading, light_sensor_reading);

    // Arbitrary choice here
    if (max_reading - min_reading < 50) return false;

    return (light_sensor_reading > (max_reading - min_reading) * 0.4 + min_reading);
}

int compare_ints(const void* a, const void* b)   // comparison function
{
    int arg1 = *reinterpret_cast<const int*>(a);
    int arg2 = *reinterpret_cast<const int*>(b);
    if (arg1 < arg2) return -1;
    if (arg1 > arg2) return 1;
    return 0;
}

int median_filter(int data_point) {
    static const size_t FRAME_SIZE = 10;
    static int data[FRAME_SIZE];
    static int sorted_data[FRAME_SIZE];
    static size_t data_size = 0;

    //shift data
    data_size = min(FRAME_SIZE, data_size + 1);
    for (int i = data_size - 1; i > 0; i--) {
        data[i] = data[i - 1];
    }
    //add in new value
    data[0] = data_point;

    // Create a sorted array
    memcpy(sorted_data, data, data_size * sizeof(int));
    std::qsort(sorted_data, data_size, sizeof(int), compare_ints);

    // Get median
    return sorted_data[data_size / 2];
}

void loop() {
    static bool motor_is_on = false;

    int light_sensor_reading = analogRead(LIGHT_PIN);
    int temp_sensor_reading  = analogRead(TEMP_PIN);

    int filtered_temp = median_filter(temp_sensor_reading);

    double temp_in_c = voltage_to_celcius(raw_to_voltage(filtered_temp));
    bool is_light = auto_tune_light(light_sensor_reading);

    Log(L"Temp: %f\r\n", temp_in_c);
    Log(L"Light: %d\r\n", light_sensor_reading);

    if (is_light && temp_in_c >= FAN_ON_TEMP && !motor_is_on) {
        toggle_motor(motor_is_on);
        motor_is_on = true;
        Log(L"Motor On\r\n");
    } else if ((!is_light || temp_in_c < FAN_ON_TEMP) && motor_is_on) {
        toggle_motor(motor_is_on);
        motor_is_on = false;
        Log(L"Motor Off\r\n");
    }
}
Cool Add-Ons
The following information is optional, but is aimed to give you a glimpse of the development possibilities.
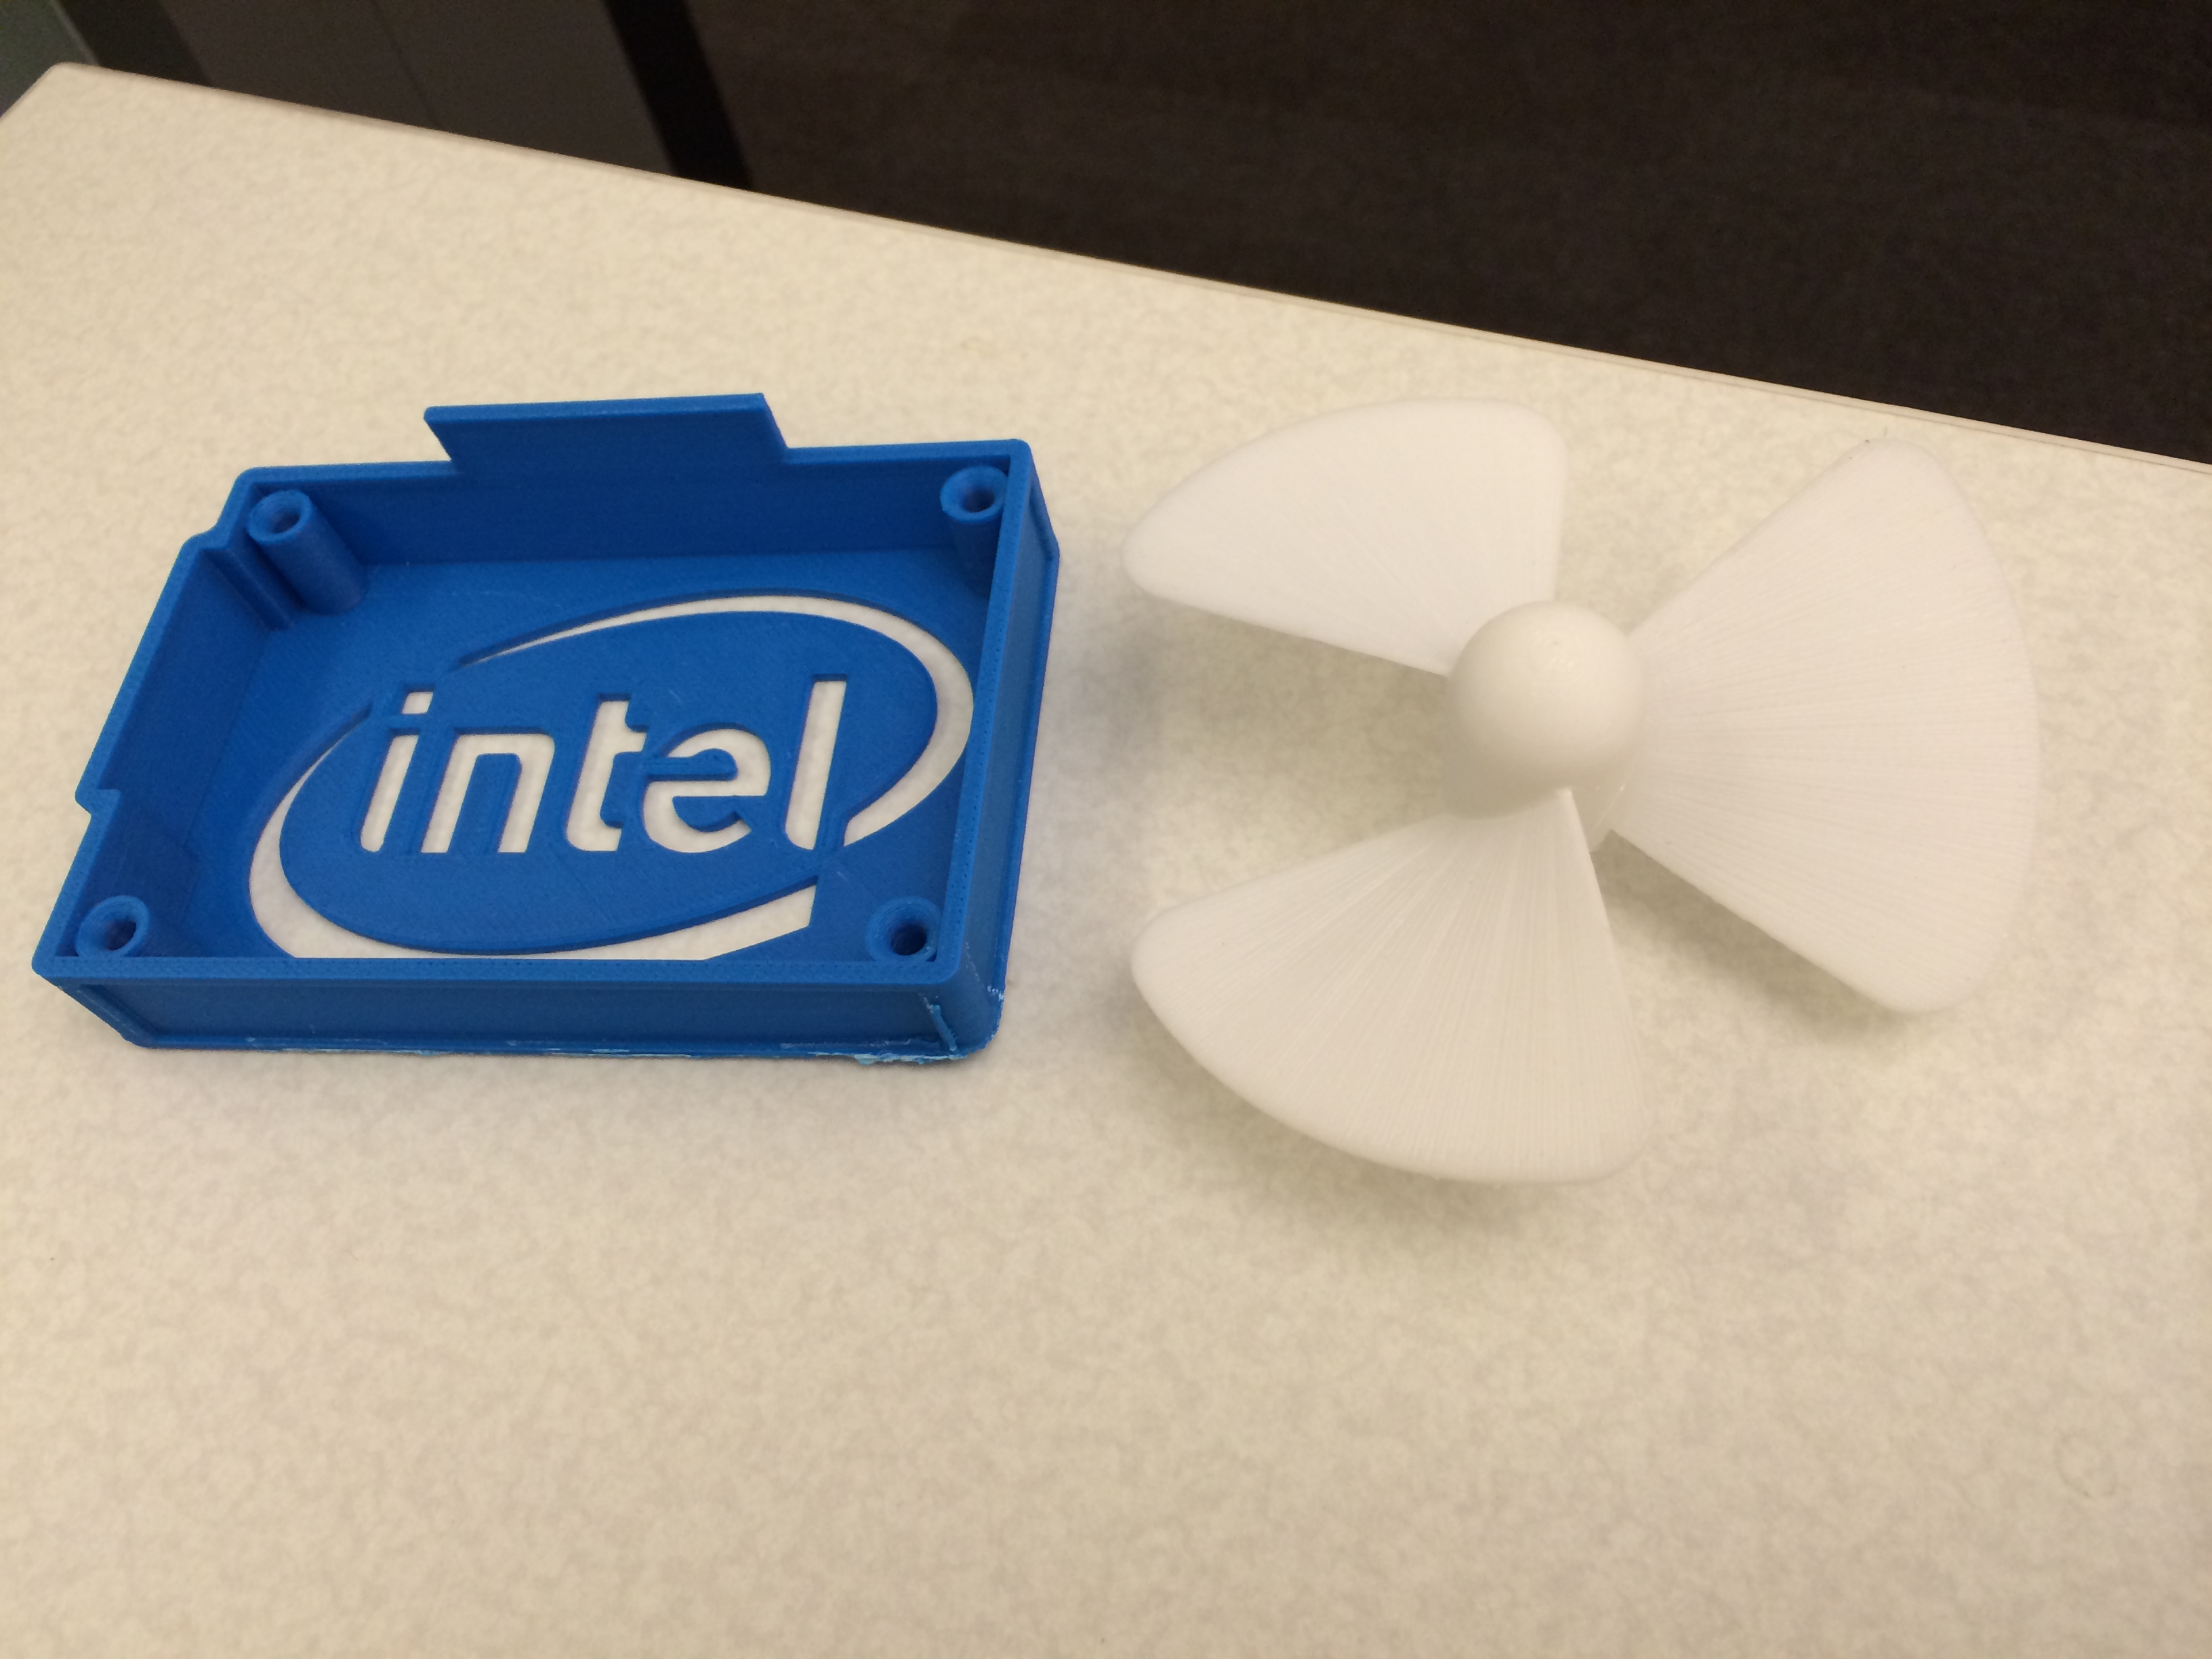
Use a 3-D Printer
3D printing is a great way to add accessories, functionality, and character to your project. For this particular project, try printing out the fan blade, or Intel Galileo Case from the links provided below.
Fan Blade
Intel Galileo Case
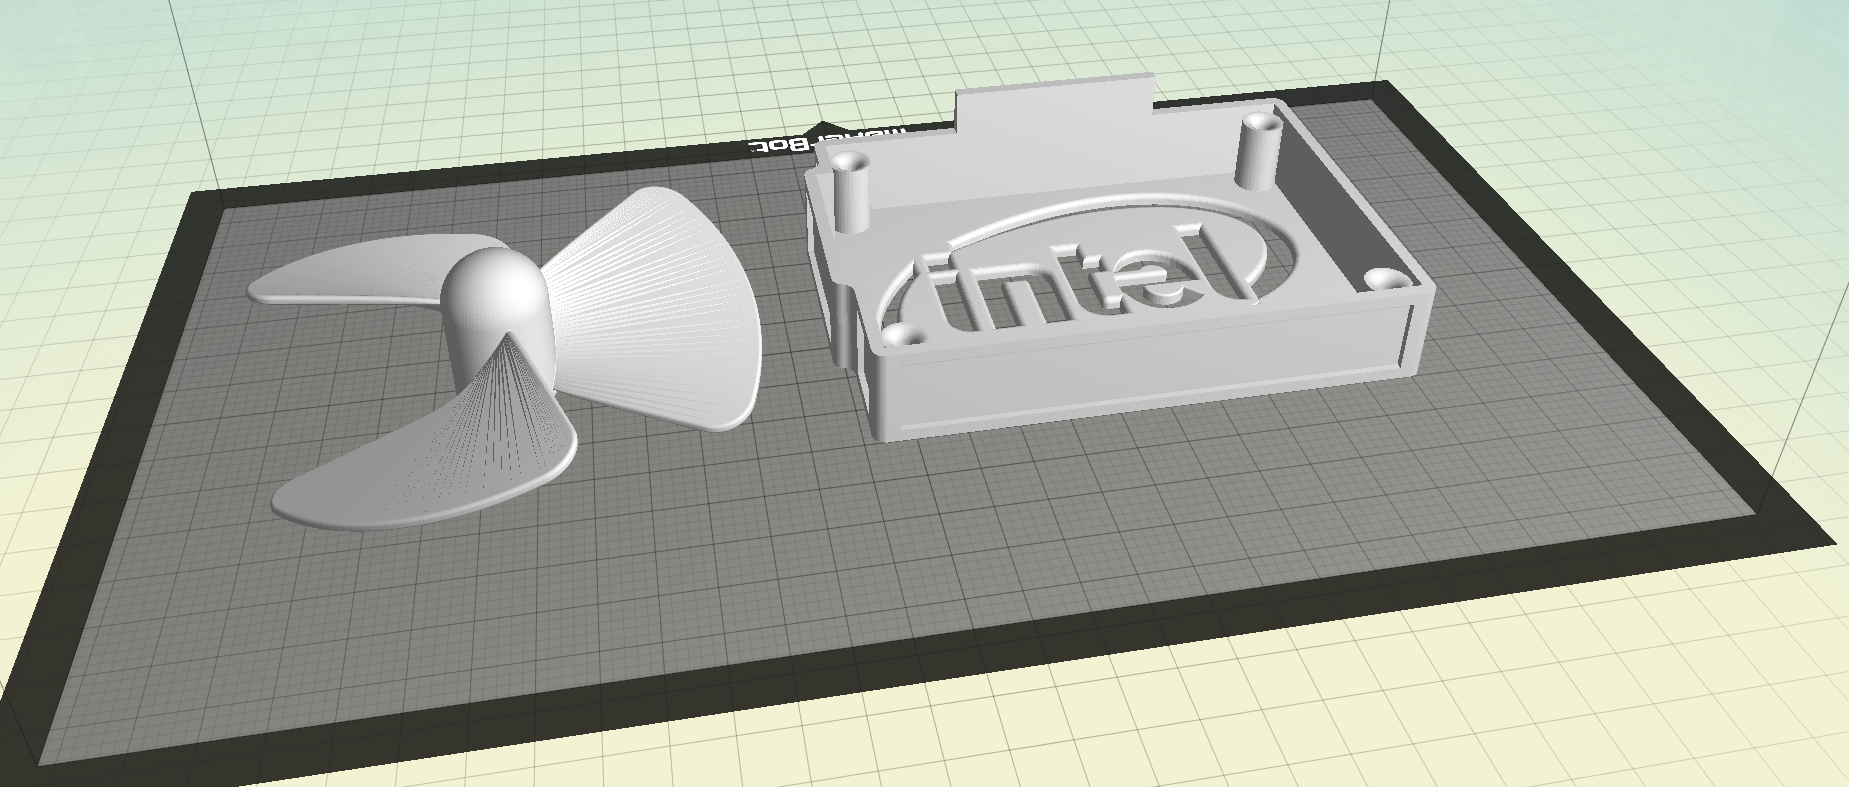
More examples and 3D models can be found on www.thingiverse.com. Be sure to maximize print time by laying pieces out strategically.
Control Fan Using a Web Application
Create a Web Application that will allow you to set your ambient temperature, or control your fan speed.
Add Sensors and Complexity to the Fan
Connect an RGB light to change color depending on fan speed or temperature of the room.
Create your own ideas?
We want to hear your ideas and see your Add-ons. Email us a small video clip of a cool new feature you added for the SmartFan for a chance at showing off your ideas to the world.