Advanced Usage
This page describes things you can do with Windows running on Intel Galileo.
Communication
Open a network share to your Galileo
Open up a file explorer window and type the following into the address bar:
\\<name of your Galileo>\c$
Allow UART port to be used by HardwareSerial
This will change it from Kernel Debugger use.
- Shut down Galileo and remove power
- Remove micro-SD card and plug it in to a PC – in this example, it is mounted as drive
K: -
Run a command prompt as an Administrator
bcdedit /store k:\efi\microsoft\boot\bcd /enum bcdedit /store k:\efi\microsoft\boot\bcd /set {default} debug No bcdedit /store k:\efi\microsoft\boot\bcd /set {default} testsigning OFF bcdedit /store k:\efi\microsoft\boot\bcd /enum - Verify debug and testsigning are now “No”
- Safe dismount of micro-SD from PC (eject from Windows Explorer)
- Put micro-SD in Galileo and powered up
Setup a Wi-Fi to Ethernet adapter
You can wirelessly connect your Intel Galileo to the internet by use of a Wi-Fi to Ethernet bridge.
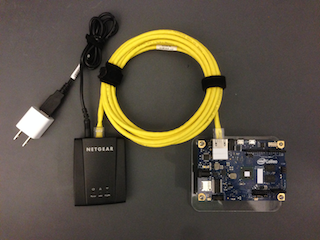
Netgear WNCE2001 pictured
Bridge your PC’s network connection to the Galileo
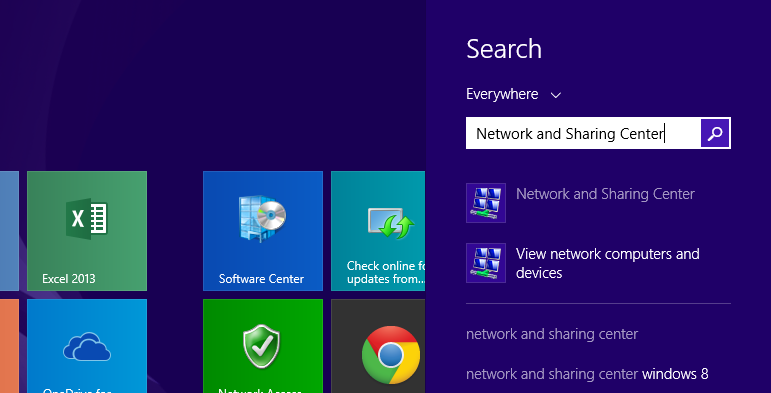
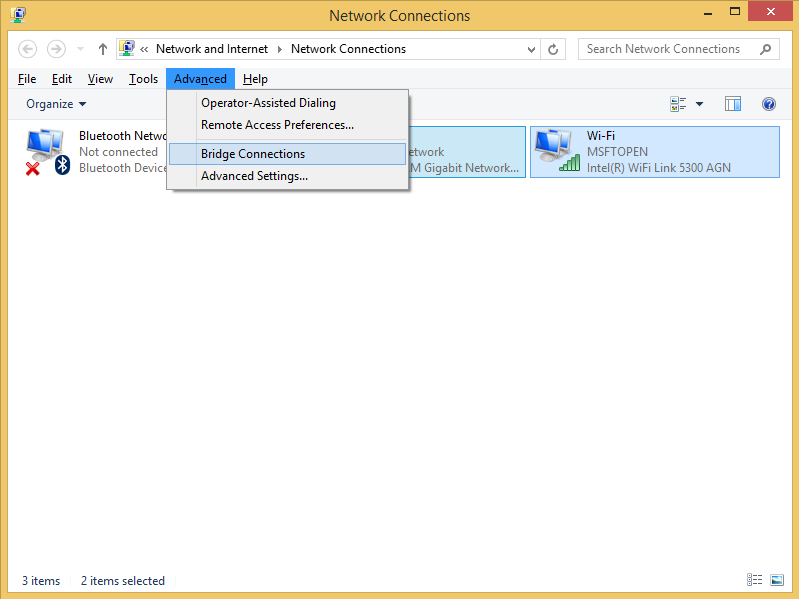
You can provide internet connectivity (wireless or other) by sharing, or “bridging”, your PC’s network connection. When you connect your Galileo to your PC directly (as outlined here, then you can share the network connection the PC is using to connect to the internet with the Galileo by following these steps:
-
Open the “Network and Sharing Center” from the Start Screen.
-
Select
Change adapter settingsfrom the left hand column.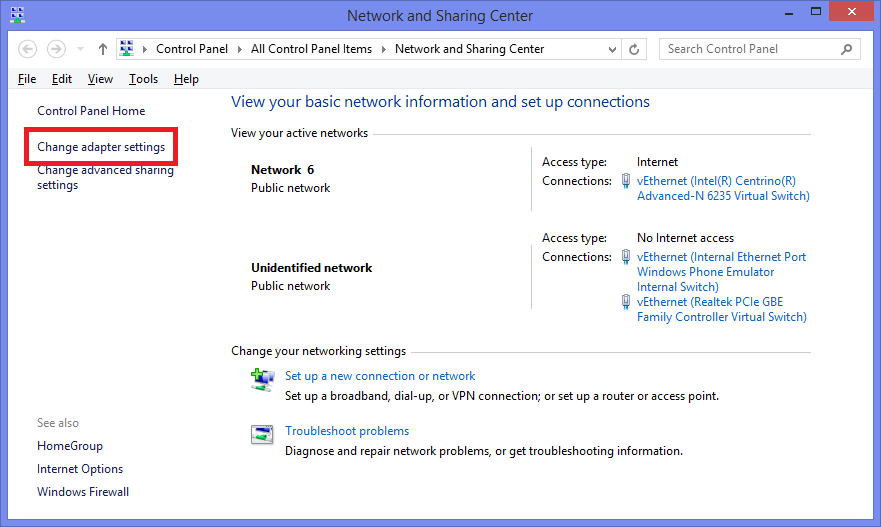
-
In the network connection settings select
Layout->Menu barfrom theOrganizedrop down menu.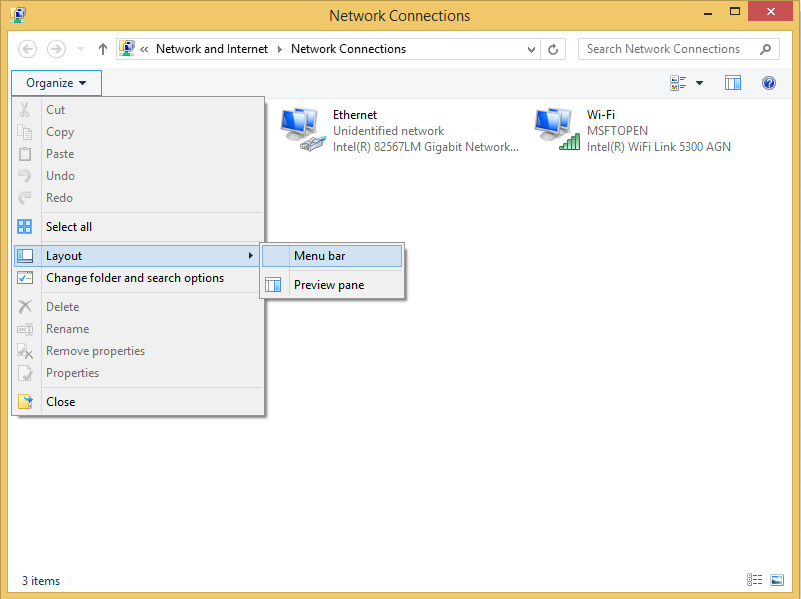
-
Select your “Ethernet” connection (to the Galileo) and your other connection (to the internet) [“Wi-Fi” pictured].
-
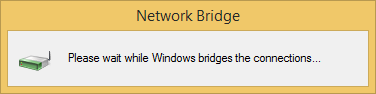
Wait for connection to be created
-
Once the bridge has been created and new connection will appear, labeled “Network Bridge”.
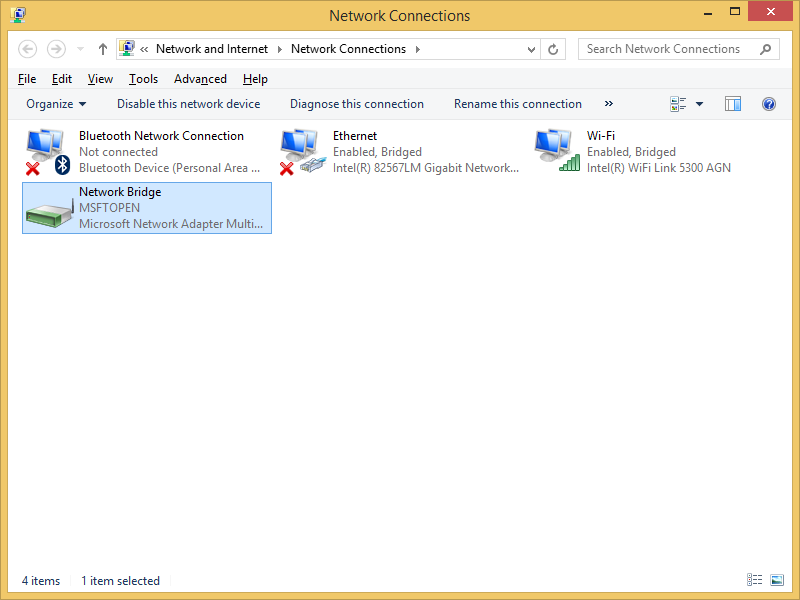
Now that your network bridge has been setup, your Galileo should be able to access the internet via your PC’s internet connection.
Use ping bing.com from a telnet session to your Galileo to confirm.
Customizing Windows
Making your Galileo run an exe on boot
- From a file explorer window, navigate to
\\mygalileo\c$\Windows\System32\Boot - If prompted enter the username as \Administrator and the password as admin
- Right click on
autorun.cmdand select Edit - At the end of the file add:
start YourAppLocation\YourAppName.exe
Changing your Galileo’s Name
Through telnet, run SetComputerName using the following line
SetComputerName YourNewName
If you change your Galileo’s name, it will break remote deployment and you will need to change the remote debugging/deployment settings on all projects to match.
View/Kill Active Tasks
Through telnet, run ‘tlist’ to view currently running tasks
C:\>tlist
    0 System Process
    4 System176 smss.exe
  256 csrss.exe
  284 wininit.exe
  292 csrss.exe
  308 winlogon.exe
  328 services.exe
  340 lsass.exe
  420 svchost.exe
  752 cmd.exe
  764 msvsmon.exe
  772 Galileo_eboot.exe
  780 httpsrv.exe
  788 ftpd.exe
  796 telnetd.exe
  804 mwstartnet.exe
  860 msvsmon.exe
 1284 TemperatureSensor.exe
 1472 cmd.exe
  112 tlist.exe
Through telnet, run ‘kill PID’ or ‘kill Name’ to kill a currently running task
C:\>kill 1284
process TemperatureSensor.exe (1284) - '' killed

C:\>kill TemperatureSensor.exe
process TemperatureSensor.exe (1284) - '' killed
Using ‘kill Name’ will close all tasks with that name.
Add a driver to Windows
If you are building your own driver, you can install it on Windows using the following steps. If you are attempting to install on the Intel Galileo a driver that was design for desktop Windows, it will likely fail due to missing dependencies or due to the Quark instruction set.
- Copy your windows image (.wim file) to “C:\Temporary\images”
- Copy the drivers you wish to add to “C:\Temporary\drivers”
- Create an empty folder named “offline” to “C:\Temporary" so the final path would be “C:\Temporary\offline”
- Run a Command Line (cmd.exe) as Administrator.
Dism /Get-WimInfo /WimFile:C:\Temporary\images\9600.16384.x86fre.winblue_rtm_iotbuild.140731-1000_galileo_v1.wim
Deployment Image Servicing and Management tool
      Version: 6.3.9600.17031
      Details for image : C:\Temporary\images\9600.16384.x86fre.winblue_rtm_iotbuild.140731-1000_galileo_v1.wim
      Index : 1
      Name : MODERNCORE_INSTALL
      Description : <undefined>
      Size : 800,100,664 bytes
      Index : 2
      Name : MODERNCORE_BOOT
      Description : <undefined>
      Size : 763,402,132 bytes
      The operation completed successfully.
Mount the offline Windows image file.
Dism /Mount-Wim /WimFile:C:\Temporary\images\9600.16384.x86fre.winblue_rtm_iotbuild.140731-1000_galileo_v1.wim /Name:"MODERNCORE_INSTALL" /MountDir:C:\Temporary\offline

Deployment Image Servicing and Management tool
          Version: 6.3.9600.17031
          Mounting image
          [==========================100.0%==========================]
          The operation completed successfully.
Add the specific driver to the offline image.
Dism /Image:C:\Temporary\offline /Add-Driver /Driver:C:\Temporary\drivers\'your_driver_name.inf'

Deployment Image Servicing and Management tool
          Version: 6.3.9600.17031
          Image Version: 6.3.9600.16384
          Found 1 driver package(s) to install.
          Installing 1 of 1 - C:\Temporary\drivers\'your_driver_name.inf': The driver package was successfully installed.
          The operation completed successfully.
- NOTE:
- For adding multiple drivers use /Recurse option.
Dism /Image:C:\Temporary\offline /Add-Driver /Driver:C:\Temporary\drivers\ /Recurse
Commit the changes to the image.</i>
Dism /Unmount-Wim /MountDir:C:\Temporary\offline /Commit

Image Index : 1
            Saving image
            [==========================100.0%==========================]
            Unmounting image
            [==========================100.0%==========================]
            The operation completed successfully.
Now you can apply Microsoft Windows to an microSD card as described in Bought or updating your Intel Galileo?.
To see if your driver works through telnet use ‘devcon’ command. For devcon command help look here.